Blog - How Exposure Blending Works in Photoshop
Photo Editing | by Michael Breitung
In this article, I show you how to use Exposures Blending in Photoshop to increase the dynamic range of your photos.
I cover the following topics:
- Why Blending Exposures is Important
- How My Editing Evolved over the Years
- How to Blend Exposures Using Luminosity Masks in Photoshop
- How to Prepare Photos in Lightroom for Better Blending Results
- How and Why to Blend Photos Taken at Different Apertures
Why Exposure Blending is Important
You might ask why to use exposure blending when modern cameras allow you to boost the shadows of a photo without introducing a lot of noise. And it’s true that over the years, exposure blending has become less important due to technology advancements. But there are still situations where the dynamic range of even the best cameras is not enough to capture noise-free, high dynamic range photos.
And even if you can pull up the shadows in a RAW photo to show sufficient detail, blending in those details from a brighter exposure will still give you better results. And if you like to create large prints of your images, you should aim for the highest possible quality. To achieve it, the techniques I show in this article are still relevant.

The Evolution of Exposure Blending
Many years ago, I used Enfuse GUI for exposure blending. The results I could achieve using that software looked more natural than what other HDR software delivered. This changed when Lightroom first introduced the option to blend multiple RAW photos by using its HDR feature. Without any of the tone-mapping that other software typically used, the results looked great for many photos. But there were still many situations where both Lightroom and Enfuse GUI didn’t offer enough control.
As I first learned about luminosity masks from Tony Kuyper, it completely changed my editing game. I instantly switched from automatic to manual blending in Photoshop as it provides the best control over the results.

Over the years, I further refined my workflow, and with proper preparation, even luminosity masks are often no longer required to create a perfect blend. Below, I share two workflows for exposure blending. The first workflow relies heavily on luminosity masks, while the second uses mostly normal masks. Knowing both workflows will provide you with all the techniques you need for even the most challenging exposure blending tasks.
Exposure Blending with Luminosity Masks
As a requirement to follow along in the video below, it helps to understand what luminosity masks are and how to create them. On my photo editing basics homepage, I share two videos about creating advanced masks in Photoshop. These provide a good foundation for exposure blending. In the video below, I use Lumenzia by Greg Benz*, a Photoshop plugin that makes working with luminosity masks easy.
As you see in the video, capturing the complete dynamic range of a scene on location is essential for clean results. You can do this manually or by using the automatic exposure bracketing functionality of your camera. For most scenes, using -2, 0, and +2 as setting for the automatic bracketing is sufficient. But there might be situations, where you need to add additional exposures. That’s why you should always check the photos you captured while still on location. Activate the histogram in the preview and ensure that you don’t loose shadows in the brightest and no highlights in the darkest exposure. You should also activate the automatic highlight warning if your camera supports it.
Improved Workflow with Lightroom and Photoshop
The blending workflow with luminosity masks works great. But it reaches its limitations once you have movement in your images. You achieve the best results by combining different types of masks, and with the right preparation in Lightroom, you have to rely less and less on luminosity masks.
In the video below, I show how you can equalize exposures in Lightroom to provide the best starting material for exposure blending in Photoshop. As example, I use a photo from the Seychelles, where I photographed a sunrise behind a set of palm trees and granite rocks. This scene had a very high dynamic range and contained slight movement in the palm trees – not a problem with the technique from the video as I can use a 100% brush without any special selections to blend those areas.
This workflow also works for architecture photos taken at night or blue hour. Especially for high-contrast areas, equalizing exposures in Lightroom makes the blending task much less difficult.

Combining Photos of Different Apertures
As a bonus, I want to show you one more scenario where exposure blending can be helpful. Sometimes, having an ND Filter in front of the lens alone isn’t enough to achieve the desired exposure times. Or, you might not have an ND Filter with you. In this case, the solution is to switch to smaller apertures. But while this increases the exposure time, it also introduces diffraction.
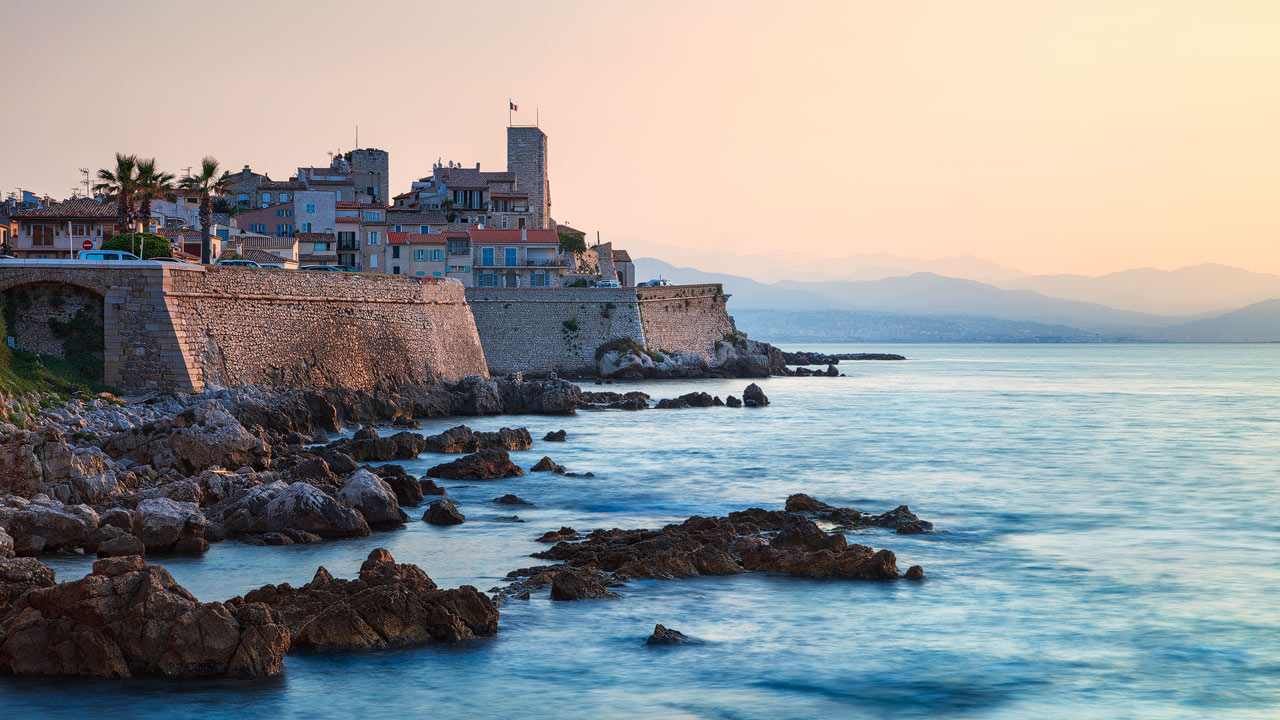
Take this photo of Antibes for example. I shot it at f/9,5 for best sharpness and detail. With a 3-stop ND Filter, I was able to lengthen the exposure to 0.5 seconds. But it didn’t smooth out the water enough. I needed an exposure time between two and three seconds to get the desired result.

In the video below, you will see how going from f/9,5 to f/19 smoothed the water but also reduced the sharpness of the image. Typically, I try not to use apertures smaller than f/13, because too much detail is lost. The solution in such situations is to take two photos and combine them in photo editing. Use the water from the photo taken at the smaller aperture and the rest of the image from the exposure taken at a medium f-stop.
To blend such photos, use a combination of normal masks and luminosity masks in Photoshop. You also don’t have to be a 100% precise when blending in the water with this technique. You can use a soft brush with a low opacity and gradually paint it in.
Conclusion
In this article I shared how I blend exposures in Photoshop. You learned how luminosity masks help to restrict the blending to shadow and highlight areas, how the combination with other masks can create better results, and how equalizing exposures in Lightroom gives you the best starting material for exposure blending.
To learn more about my photo editing and advanced techniques like focus stacking, panorama stitching, and time blending, consider my Photo Editing Mega Bundle interesting.
* This is an Affiliate-Link. If you use it to buy something, I’ll get a commission.

