Blog - How to Create Vertoramas
photo-editing | by Michael Breitung
Sometimes the widest lens is not wide enough to capture the scene in front of you in all its glory. Panoramas and Vertoramas help you extend the field of view your camera can capture. In this article, I show you how.
In the Field Process
For panoramas, you take multiple photos while rotating the camera horizontally. For vertoramas, you do so vertically. It helps to use a tripod for that, and if you want to get the perfect alignment of the images for editing, a nodal rail can be a good investment. If the scene you photograph contains elements in the close foreground, you might end up with so-called parallax errors when capturing panoramas. It helps to increase the overlap between individual images - using between 1/3 and 1/2 of overlap can improve the results during stitching. But manual retouching will be required unless you use a nodal rail and rotate the camera around the no-parallax point. You find an excellent explanation about parallax errors on the Cambridge in Colour homepage.
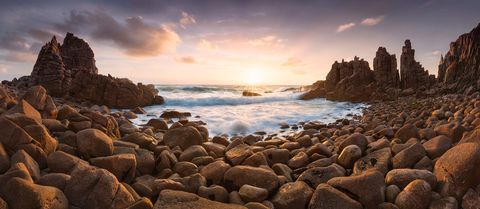
The good thing is that you can avoid these difficulties in many situations. The foreground of many landscape photos contains only elements in the lower third of the frame. Parallax errors are nothing to worry about if those don't extend too much upward. An example is the panorama of Cape Woolamai above. If you are interested in the complete photo editing workflow for the Cape Woolamai panorama, you will love this panorama photo editing tutorial.
When photographing vertoramas, parallax errors are even less likely to occur since you tilt your camera upward between taking the individual images. The best use-case for vertoramas is adding more sky to your photos. It's also the easiest application of this technique. Try to get the main elements of the scene into a single frame. Don't worry, if those elements extend close to the upper edge of the picture. Examples are mountains in landscape photos or buildings such as the GM Renaissance Center in Detroit in architecture photos.

Just include some area of sky at the top that you later use to blend the images. Once you've captured the main image containing all the landscape or architectural elements, focus on the sky. Point your camera upward and take a second photo.
Vertorama Photo Editing
Stitching both photos to create a vertorama is easy if the blend is done solely in the sky area. If you have other elements extending beyond the upper edge of the frame of the first photo, it can be a challenge, and the technique I show in the videos below will not work. You will then have to experiment with Photoshop's automatic panorama stitching functionality or use a tool like Hugin, which I also use in my panorama editing tutorial.
The video above shows the vertorama stitching process for an architecture photo, while the video below focuses on a landscape photo. In both cases, the stitching was done exclusively for the sky. The main elements of the images - the GM building in the first and the mountains in the second video - were left untouched in the editing process.
If you try to apply automatic stitching in Photoshop or Hugin instead of using the manual stitching I show in the video, you can end up with a distorted landscape or architecture based on the projection setting you use. Especially with architecture photos, this can look unnatural.
Conclusion
As you've seen in the videos, creating vertoramas is not hard. It's also something you can do when capturing night photos as it helps you to include more stars in your images. The only thing to be aware of is that all the main elements are contained in the first image you take so the blending can be done completely in the sky area. As you've seen in the videos, creating vertoramas is not hard. It's also something you can do when capturing night photos as it helps you to include more stars in your photos. The only thing to be aware of is that all the main elements of the photo are contained in the first image you take and that the blending can be done completely in the sky area.