Blog - Ultimate Monitor Calibration Guide
Photography Tutorials | by Michael Breitung
This monitor calibration guide shows in-depth how to achieve a properly calibrated system for photo editing. I take you step by step through the complete process, using a colorimeter and software from Calibrite.
I cover the following topics:
- Why Monitor Calibration is Important
- Required Calibration Tools
- How to Calibrate Using i1Profiler from Calibrite
- How to Meature Monitor Uniformity
- Tips for Photo Editing
Why a Calibrated Monitor Is Important
Having a properly calibrated monitor has always been high on my priority list when it comes to photo editing. It's the only way I can ensure that the color and tonality of the photos as I see them on my display look the same on the calibrated display of photographers, editors or customers. Color accuracy is key in the professional photography world where photos are sold via multiple outlets for countless different uses. Moreover, I can only do proper soft-proofing for my prints, if I have a calibrated display.
So, it should be out of question that we as photographers should edit our photos on a calibrated screen to ensure an accurate color representation. But how does the calibration work? I will share all the details in this monitor calibration guide.
Note: While the process I describe below will work for any display, not all displays can be calibrated equally well. Some displays have just a limited color gamut and hence cannot be calibrated to match the target color spaces that are available in the calibration software. And even for displays with a large enough gamut, display quality might prevent an accurate and consistent result. To be able to make an informed buying decision for a monitor you can check sites like Prad.
Colorimeters
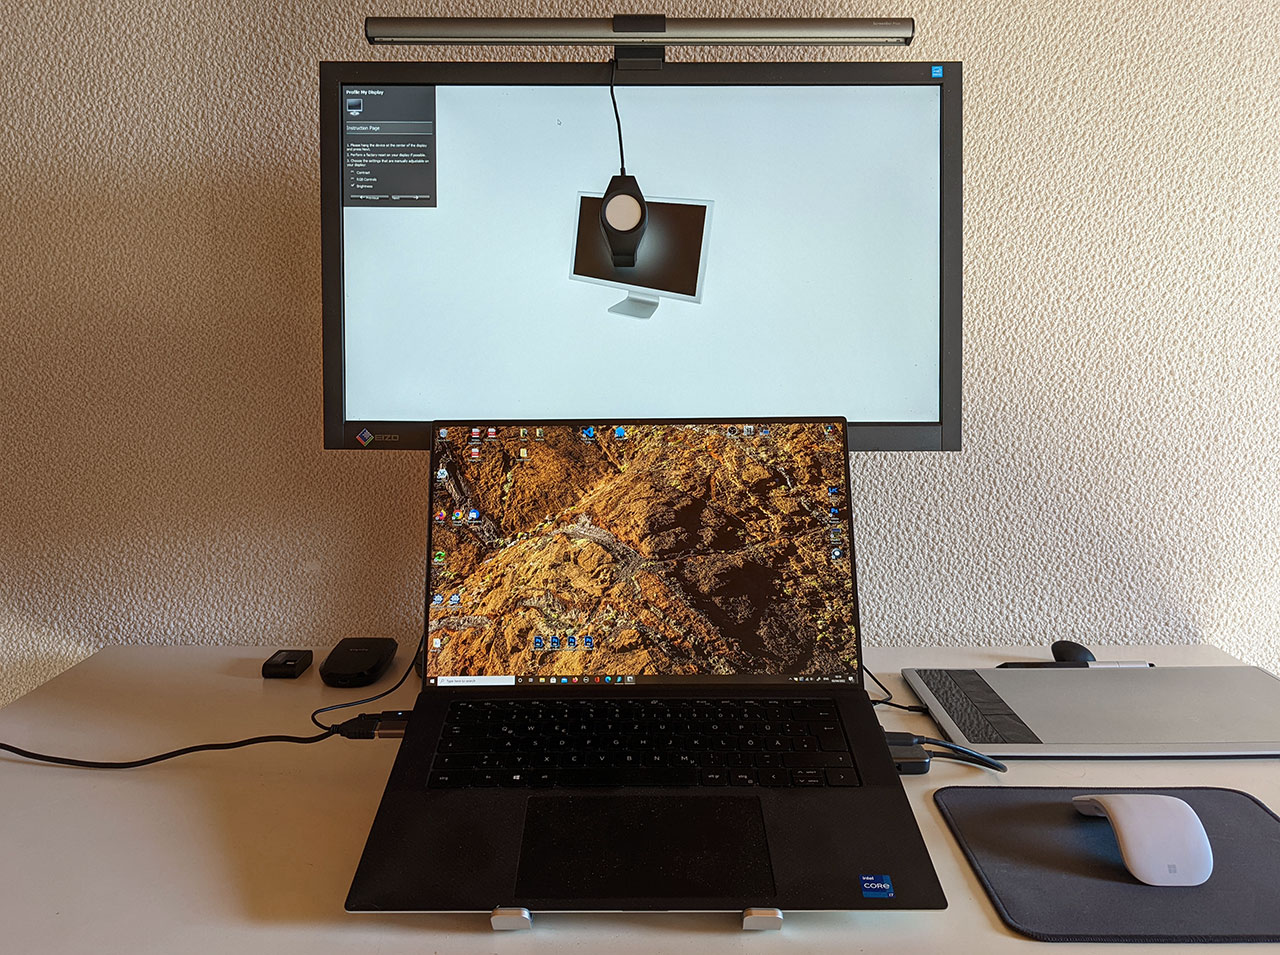
To calibrate a display we need a calibration tool that can measure colors. Such a device is called a colorimeter. The most popular calibration devices are available from Calibrite, formerly X-Rite, and Datacolor. I myself use the X-Rite i1 Display Pro*, which after some rebranding is now called ColorChecker Display Pro by Calibrite. It's a compact piece of hardware that I use to calibrate both the screen of my Dell XPS* and my external EIZO display.
But a colorimeter alone is not enough. What's also necessary are drivers and calibration software. Typically, if you purchase a calibration device, it comes with the proper software and drivers. There is also an open source software available called DisplayCAL. I haven't tested it myself, but based on the documentation and screenshots on their homepage it looks promising.
The combination of colorimeter, drivers and calibration software then allows you to create a monitor specific color profile in form of an ICM file. For this the software displays a set of known colors on the screen, which are measured by the colorimeter. The result of those measurement is fed back into the software, where it is compared against the known color values. The disparity between the two is then used to create a custom color profile for the screen. The goal of this profile is to reduce the disparity to a minimum delta.
In addition to the color values, the colorimeter also measures the brightness of the screen, which is typically the first step in any calibration process. Getting the brightness of a screen right is the foundation of a proper monitor calibration and I will give some tips on setting brightness values below.
Monitor Calibration Guide
In this section I will walk you through the different steps that are required to calibrate a monitor. I will show screenshots from the i1Profiler software, which is now called ccProfiler by Calibrite. If you use a Spyder from Datacolor to calibrate your screen, the settings in their software should be similar.
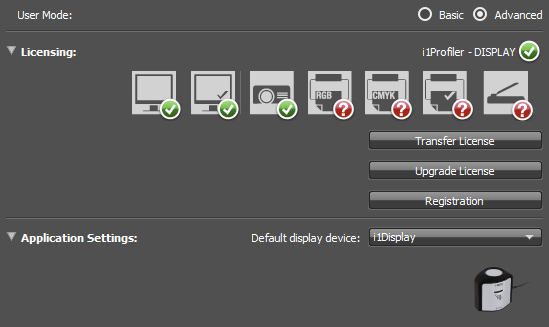
After giving your monitor a few minutes to warm up, the first step during calibration is to connect your calibration device to your PC or Mac and start the calibration software. It should automatically detect the colorimeter, if the drivers are installed properly. In the image below you see I have set the User Mode to Advanced. In advanced mode you get access to a few more settings than in basic mode. As you will learn below I don't touched many of those during calibration, so most of the time you will be fine using the basic mode.
Based on the type of the used calibration device different checkmarks will show up under Licensing. With my calibration device I get the proper licenses to calibrate monitors and projectors, which is all I need. What I cannot profile are printers and scanners. I also have different options available in the pane on the left-hand side of the i1Profiler software. For my device I find three options under Display, which are Profiling, Quality and Uniformity.
Profiling a Monitor
The first step is to create a profile for the displays you use. The calibration will be performed on the display, on which the iProfiler software is shown. If you want to calibrate multiple displays you can simply move the iProfiler window to the different displays before starting the calibration. If you click on the Profiling button on the left (Display Profiling in basic mode), the software will display a screen filled with Display Settings.
Display Settings
Technology Type
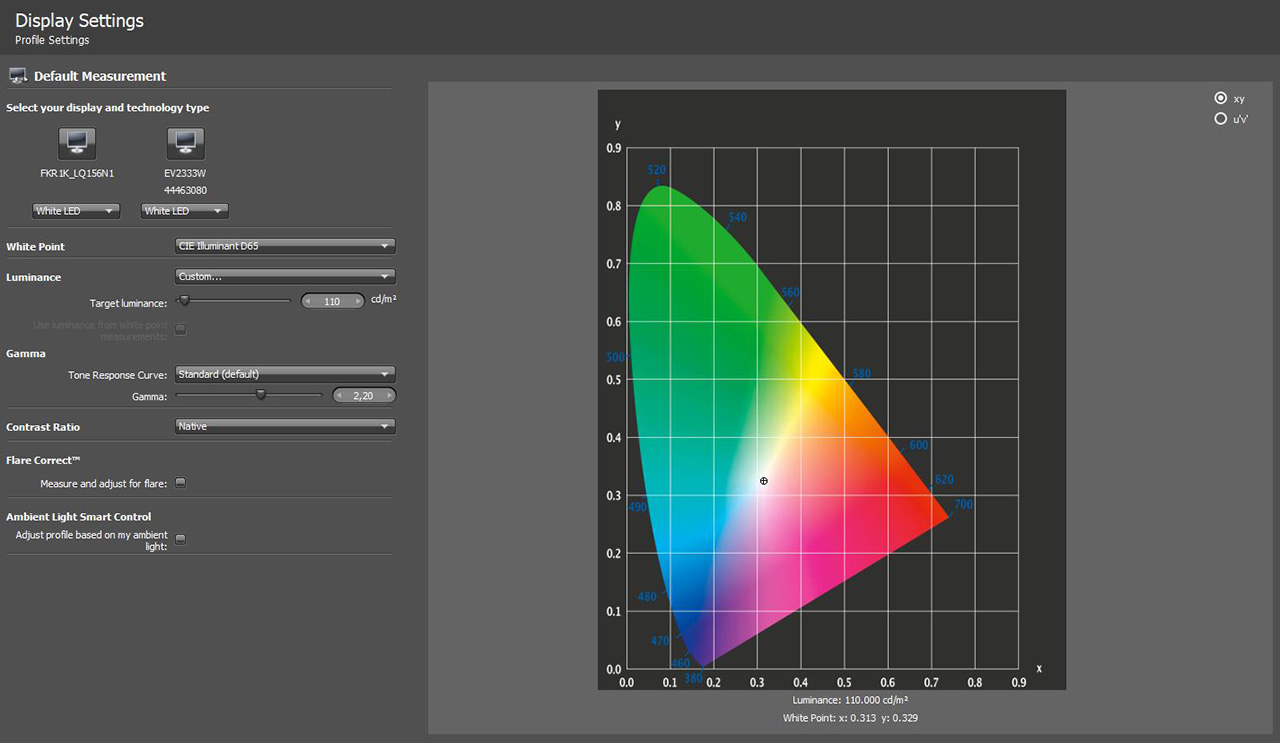
At the top you see the connected displays, which for me are the display of the Dell XPS and my external EIZO monitor. The first setting you have to apply is the correct display type. You see that I have White LED selected for my Dell and EIZO display – both live within the sRGB color space. White LED or WLED together with RGB LED (Wide Gamut), CCFL and Wide Gamut CCFL are the most typical settings here: Some older LCD Monitors use CCFL or Wide Gamut CCFL. Newer external LCDs as well as notebook displays typically use the LED-Backlight technology.
If you are not sure, which setting to use, White LED is your best bet, because it's the most widely used technology nowadays. If you want to be certain that you selected the right option, you can check this overview of display technologies for your display.
White Point
To get a good preview of how your images would look printed using modern print technologies and papers, select the CIE Illuminant D65 standard. The color temperature of this standard is 6500 Kelvin, which corresponds to the color temperature of daylight.
Luminance
This is one of the most important settings and it can be tricky to get right, because there is not one right value. The correct value largely depends on your editing environment and the brightness of the ambient light. In addition to that it depends on the major use case for which you edit your photos. As a rule of thumb, your monitor should be the brightest object in front of your eyes. But how much brighter than its surroundings should it be.
Let me give you two examples:
- If you edit in a dark room without any ambient light, your eyes will adjust to the dark environment. Hence a dark monitor will appear normally bright. For such an editing environment you'd have to set a low Luminance value of less than 80. Otherwise there's the chance that you'd edit all your photos too dark.
- The opposite is true, if your room is too bright. You would have to set the Luminance value to a higher value far above 120. Otherwise your edited photos might be too bright.
In my opinion both environments are not ideal. I work in a normally lit room with a window to the side that leaves in mostly indirect light. What you want to avoid is direct sunlight in your office. As it gets dark in the evening I use a BENQ Screenbar to provide a fill light on my desk. I generally avoid editing in the evening as at that time of day my eyes are normally too tired. If I wanted to edit in the evening, I would get a dimmable daylight lamp, which I could use to emmulate the ambient light in my office during day.
The 110 value I have set as my Luminance is a compromise and it comes from experience. I'm used to editing at that brightness and I know how to prepare my prints that way. And that's important. If you like to print your photos, be aware that a print will typically look a bit darker than what you see on your monitor, if you have the Luminance set to too bright. Best would be to get a blank piece of printing paper, look at it in a controlled lighting environment and try to match the brightness of your screen to that. This might land you at a Luminance value of 100 or less.
But as photographers we also like to share our photos online and hence, we need to find the best compromise, which is what I did through experimenting. And doing your own tests will be necessary to find what works best for you – check within the range from 80 to 120 and, if in doubt, go closer to 120, because this should provide you with accurate brightness for a wider range of use cases than 80 for example.
Gamma
If you do some research on this setting you will notice that it's quite an involved topic. The Gamma setting you make here influences how different tones are represented on the display. The difference will mostly be noticeable in the darker tones. If the wrong tone curve or Gamma setting is chosen, your images can appear to bright and a bit flat with no real black in them. A Gamma of 2.4, for example, will make the image appear more contrasty with deeper blacks while a tone curve setting of 1.8 will show more details in the dark areas.
From what I gathered, most displays follow the default 2.2 curve or are at least close to it, so selecting this setting is the safest bet. The sRGB curve is similar to the 2.2 default curve, but deviates in the darker areas – this is where you might notice a difference. There are also professional monitors that allow you to set a custom tone curve. If you happen to own such a monitor, you might want to match that settings in your calibration software.
Finally, you can use this test from Lagom after you finished your calibration to check, if your Gamma setting is correct.
Contrast Ratio
To be honest, I have never touched this value and always left it in Native mode, which gives me good results. If you use the basic mode, this setting will not be shown.
Flare Correct
This is another one of the advanced settings, which I never activate. It can be used to compensate for flare light falling on the display, which is something you should try to avoid by properly positioning your monitor.
Ambient Light Smart Control
Same as Flare Correct I leave this setting unchecked. If you activate it, the colorimeter will create a measurement for the ambient light in the room. The profile is then adjusted based on this reading. This can be helpful, but it also introduces an additional variable into your editing setup, which you don't control yourself. I rather try to ensure that the light in my room fits the settings I have made for the calibration.
Profile Settings
If you are in advanced mode, you will see the Profile Settings screen once you click on Next in the lower right corner. I would recommend to not change those and leave the defaults active. The only thing you want to make sure is that the correct ICC Profile Version is selected. Default for MAC should be Version 4 and for Windows it should be Version 2. On this site, you can check, if your system is capable of using Version 4 or only supports Version 2.
Patch Set
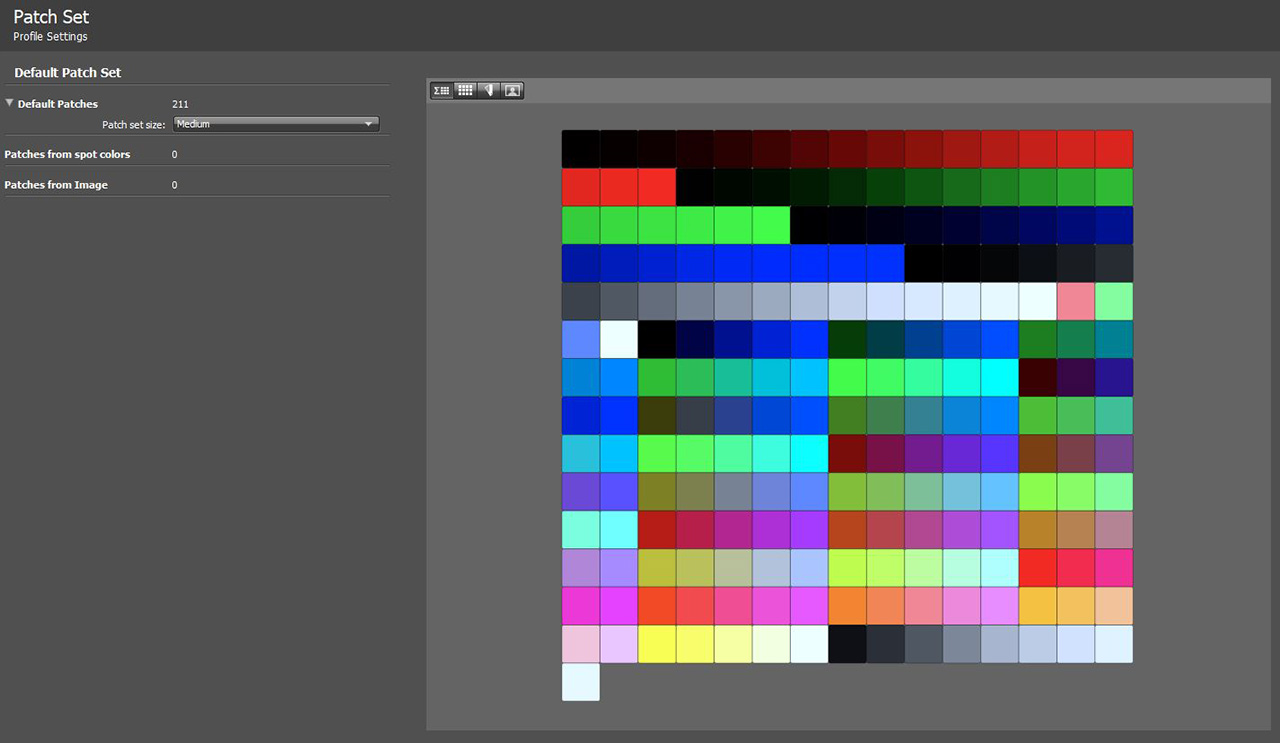
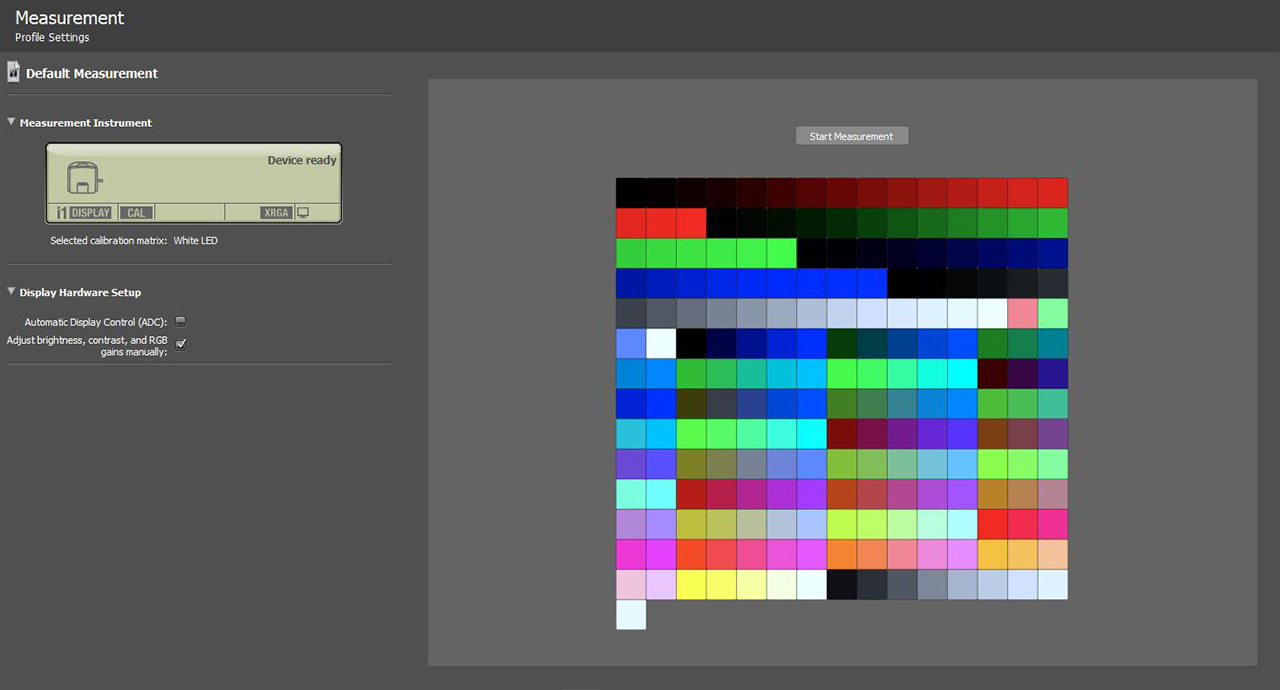
On the next screen you can select the Patch set size, which is again an advanced setting and maybe the only one I actually change. Because I found I get a better calibration for my Dell XPS display, if I set the patch size to medium. With medium 211 colors will be used for the calibration versus 118 colors with the small set, which is used in basic mode.
Measurement
The final page before starting the profiling is the Measurement page. Here you should check Adjust brightness, contrast, and RGB gains manually. Even if you don't own a professional monitor where you can set the contrast and RGB values manually, you can always set the brightness. And even on a notebook display you can adjust the brightness by going into the display settings of your operating system settings.
Profiling
Then it's time to click on the Start Measurement button and follow the instructions on the screen, which includes positioning the calibration device in the middle of the monitor. The first measurement is for the brightness. At this stage you can make manual adjustments to your screen brightness to match the desired setting.
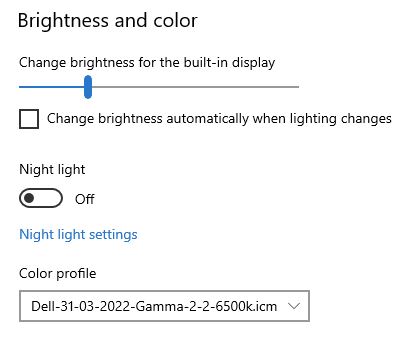
If you are only able to do this in the settings of your operating system, it helps if you have two monitors. Then you can show the settings on one monitor, while the calibration runs on the other. If you only have one screen, iProfiler will prevent the settings window to appear. You can then try to use the function keys for brightness on your keyboard or you have to leave the calibration, make the setting and start it again. This is a bit tedious because you might have to repeat this step a few times to dial in the proper value.
An important note here: If you change the brightness setting during the calibration, don't change it afterwards. This also means that you have to deactivate any automatic brightness changes based on ambient light, which your system might support. This would mess up your calibration.
Also, if you use an external monitor, those often come with different modes like Cine, Vibrant, Gaming or some similar set of modes. Make sure to reset the mode to default before the calibration and leave it at that afterwards.
Review and Saving
Once the profiling has finished it's time to review the result and to save the profile. On this page you can also set a Profile Reminder so you don't forget to regularly check the quality of your calibration and to remeasure, if necessary.
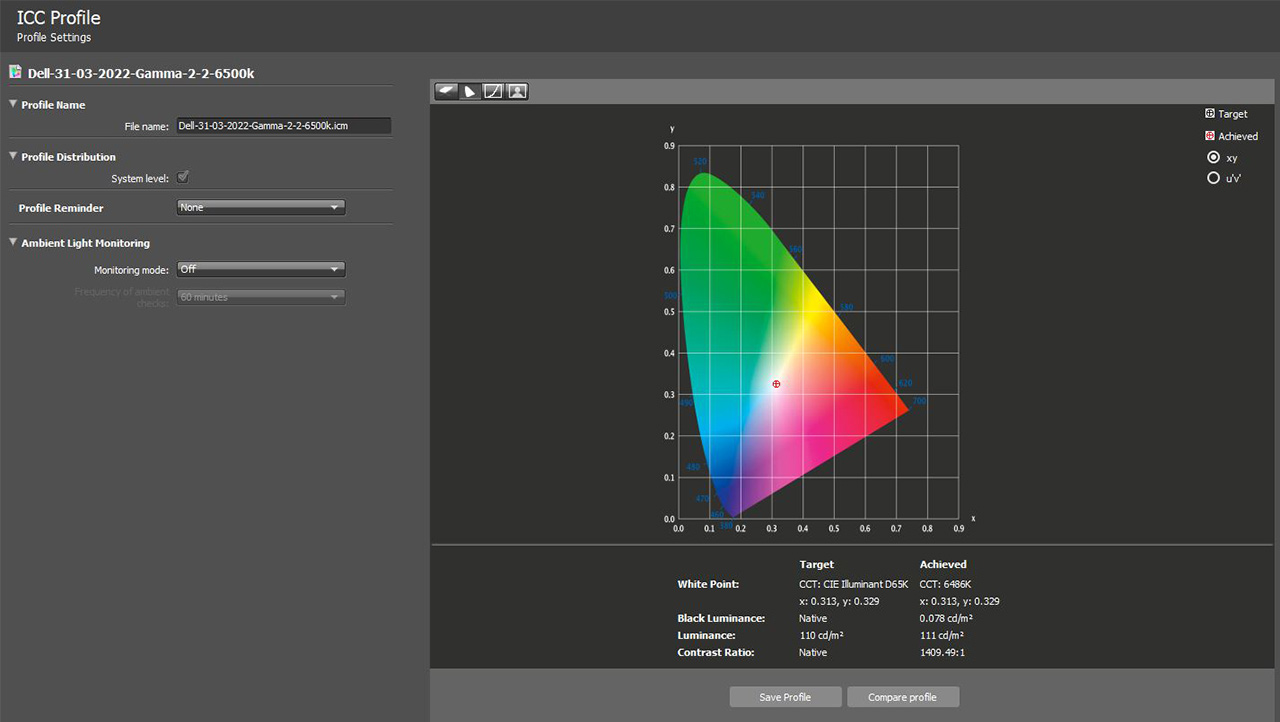
Once you have saved the profile, it is automatically selected as the active profile for your system and will be active right upon startup. On Windows there is sometimes a little delay until the profile is loaded. I notice this through a color shift a few seconds after Windows has started.
Display QA Reference
I usually check the quality of a profile right after its creation. In advanced mode click the Display QA button in the bottom pane of iProfiler. This will take you to the Display QA Reference page.
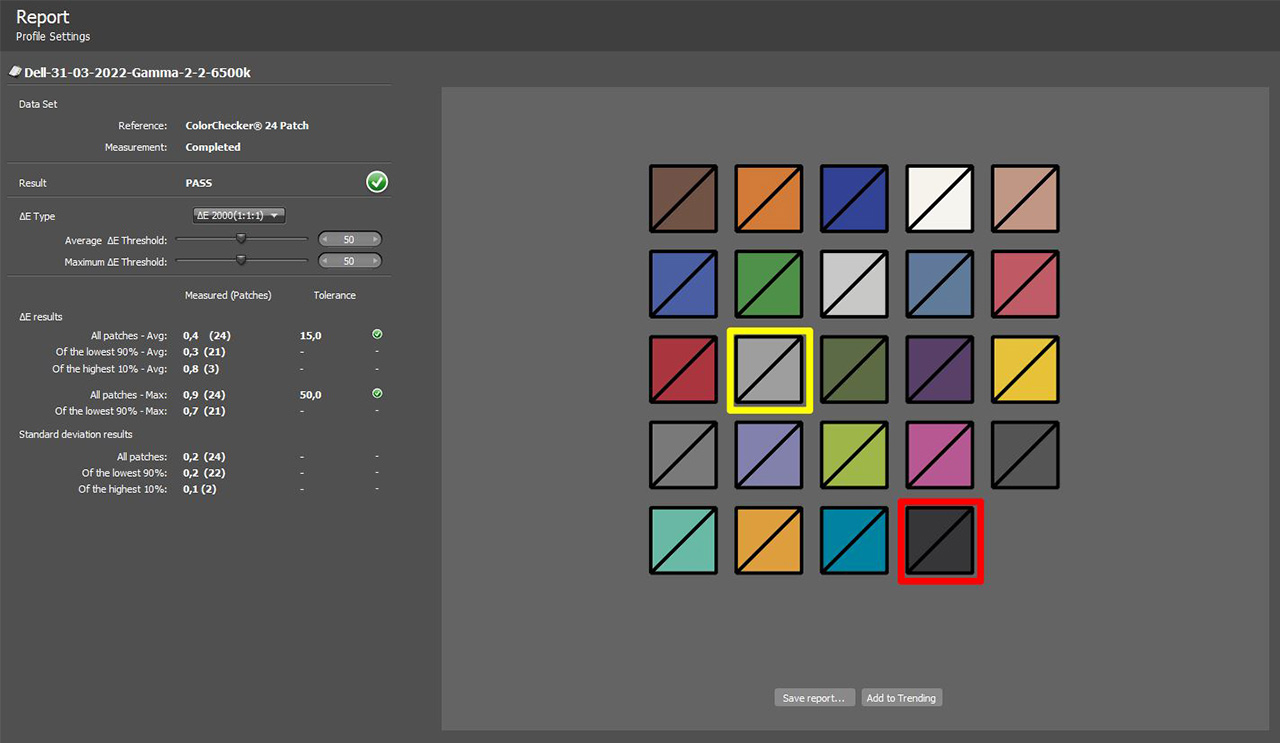
Here a small set of 24 color patches is measured to asses the quality of the active profile. A report is created that shows the average delta for the measured patches as well as the maximum deviating patches. I usually try to get the max values beneath 2 and the average beneath 1 and I repeat the assessment regularly to maintain the quality of my calibration. If I'm in advanced mode a Quality button is available in the pane on the left, which directly brings me to the measurement page.
After every measurement, which I do once a month, I use the Add to Trending button to create a graph that shows the development of the accuracy of the calibration over time. For my EIZO the quality is quite stable. But for my Dell I found that it deteriorates much quicker and I have to recalibrate every few months.
Monitor Uniformity
In advanced mode you will find another feature on the left side of the iProfiler software. The Uniformity measurement can be used to check the brightness distribution of your monitor. It's typical that there will be some difference between the center area and the corners, but the delta shouldn't be to high for a professional editing environment. If it is too big, this might tell you that you should get a better display.
Monitor Calibration Video
In addition to this article I have also created a video tutorial, in which I walk you through the different steps. The content of the video will largely overlap with this article. It's mostly intended for people that enjoy videos more than text.
Bonus Tips for Photo Editing
I want to finish this article up with some additional editing tips, which will help you to get consistent color and contrast quality in your photos. Because, in addition to calibrating your monitor, it's also important to calibrate your eyes. In general your eyes will adjust very quickly to the environment through a process called adaption. But if you get into the office after spending hours outside on a bright day, you might want to give your eyes a few minutes to adjust to the darker environment.
You should also avoid a too colorful editing environment. That means, don't paint the walls in your office in intense bright colors. Your perception of colors will shift and this will affect your editing, especially the setting of the color balance for your photos. For this reason I prefer to work in an office where behind my monitor I have a mostly white or grey wall.
Finally, to get consistent colors in my photos I will usually look at 10 to 20 of my favorite photos that show a wide range of colors before I start editing. This way I prime my vision for the kind of colors and contrasts shown in those photos and it will be easier to replicate that look. Throughout the editing I will regularly look at some of my portfolio photos that were taken in similar light as the one I'm working on.
References
Here I have gathered some references for further reading:


