Blog - Focus Stacking in Landscape Photography
photography-tutorials | by Michael Breitung
In this guide about focus stacking in landscape photography, I show you how focus stacking works in the field and how to stack photos during photo editing.
Why Focus Stacking is Important
One of the first things I learned when starting with landscape photography was that selecting a small aperture results in a large depth of field. So, the formula to capture a photo containing elements in the near foreground and details in the background is to use an f-stop of f/16, f/19, or even f/22.
But not so fast. Stopping down a lens can decrease the overall sharpness of an image because of a phenomenon called diffraction. Depending on your camera-lens combination, you will usually begin to notice this degradation of image quality for apertures smaller than f/11 if you zoom in close on an image during photo editing or if you create a large print of a photo.

The good thing is that when photographing with a wide-angle lens, you can achieve a large depth of field without resorting to small apertures. Combining apertures between f/8 and f/11 with the correct focal point, called the hyperfocal distance, can yield great results. Focusing on this point ensures acceptable sharpness from half the hyperfocal distance toward infinity. But from my experience, acceptable sharpness is often not sharp enough. And since the hyperfocal distance depends on the focal length of the lens you use, its usefulness is limited. When you photograph with a long lens, the depth of field will not be enough, no matter how perfect you set the focus.

You can argue that not every image needs to be sharp from foreground to background. And you are right. The decision to only have a small area of an image in focus is an artistic choice. But you likely don't want it for all your photos. Especially with landscape and architecture photos, I prefer sharpness throughout the image, and focus stacking can give me that without the discussed limitations.

What is Focus Stacking
Focus stacking is a technique that's become very popular in landscape photography over the last few years. It originates from macro photography, where the depth of field is usually very shallow. Multiple photos of the same scene with different focal points can be taken and combined to increase it. The merged photo will contain the combined depth of field of the single images if the stacking is done right.
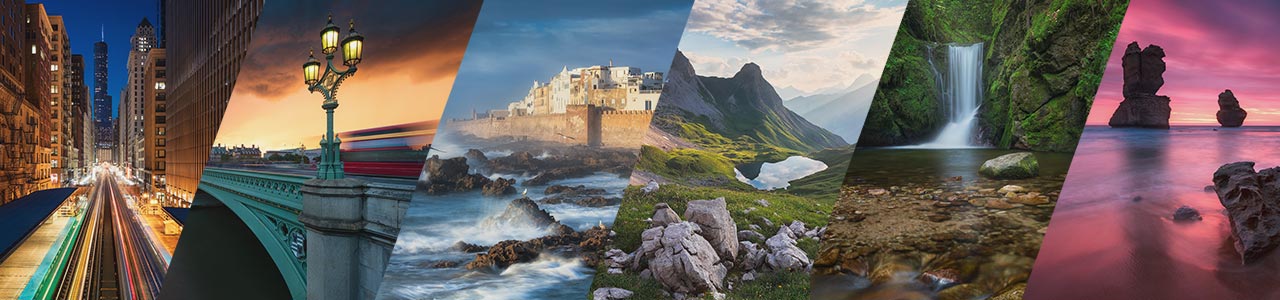
While in macro photography, many different photos need to be stacked to get the desired depth of field, for landscape and architecture images, most of the time, between two and five photos suffice. An example is the image I captured at Anse Source D'Argent.

In Practice
You might ask how to know how many photos you need to take and where to set the different focal points. It was hard to provide a recipe that always worked in the past because you had to select the focus points manually. But modern cameras often come with automatic focus bracketing that takes away a lot of uncertainty. The Canon R5, for example, will determine how many photos to take and where to focus based on the selected focal length and aperture, ensuring enough overlap in sharpness between the individual images.

Below, I share different techniques you can use to stack your images, including manual and automatic focusing. All those techniques have the goal of capturing a sequence of images with focus points ranging from close foreground to far background. The depth of field of those images must overlap to get continuous sharpness in the stacked photo. Using apertures between f/8 and f/11 provides the best compromise between sharpness and ease of stacking later.
Automatic Focus Bracketing
Let's start with the state-of-the-art, automatic focus bracketing. This feature even allows capturing the images of a focus stacking sequence handheld if it's bright enough. Photo editing software will be able to compensate for minor movement between individual frames. But for the best results, always use a tripod.
In the video below, I show you how to use the focus bracketing feature of the Canon R5 as an example. I cannot give you direct guidance for other brands, but I assume their stacking features work similarly.
As you see in the video, the first step after activating automatic focus bracketing is to focus on the element in the photo closest to the camera. Using the two-second timer, you start the stacking by pressing the shutter button. The camera does the rest, capturing several images while moving the focus from foreground to background.
Semi-Automatic Stacking
The Canon R5 limits automatic focus bracketing to situations where the individual exposure times are less than or equal to 0.5 seconds. In other cases, I have to select the focal points myself. If you also run into such a limitation with your camera, use the touch screen of your camera to set the focus, provided it has one. Tap on the screen to select different focus points between foreground and background. If you are not sure where to focus and how many images to take, make small increments and take more photos than you think you need to be on the safe side. You can delete images you don't need later during post-processing.
For this technique to work, you either let the camera automatically release the shutter after you tap on the screen or select back-button focus. It prevents the camera from re-focusing when you press the shutter.
Manual Workflow
If you know your equipment, it's also possible to perform fully manual focus stacking by just turning the focus ring of your lens between taking the different photos. With some experimenting, you will know how far to turn the ring to get a sufficient overlap of sharpness. I used this technique years ago when cameras didn't have touch screens or automatic stacking capabilities.
Photo Editing
When you arrive home after a hopefully successful photo trip, the first step before stacking your photos is to check the overlap in the depth of field of the different images. It's a good idea to mark the pictures you want to use for stacking. In Lightroom, I usually use green color to select the photos.
Then, as with any RAW photo you edit, apply your settings to one image of the sequence in Lightroom or whatever editing software you use. Once you are satisfied with the result, synchronize the settings to the other photos of the sequence. Then, it's time for the stacking. As with the in-the-field process, you have different options to stack your photos.
Automatic Stacking in Photoshop
Photoshop supports the automatic stacking of images. But I never use these features. As I show in the video below, even for simple scenes, it usually requires manual adaptions of the resulting stack. First, you load all images into layers in Photoshop. You can do so directly from Lightroom. In Photoshop, you select all layers and go to Edit - Auto-Align Layers. This step is important, even if you use a tripod in the field. During focus stacking, the field of view slightly changes. The auto-align feature compensates for it.
Directly next to the Auto-Align Layers feature, you find Auto-Blend Layers. In the dialog that opens when selecting it, choose Stack Images and keep Seamless Tones and Colors active. Pressing OK will perform the stacking. In the video, I show how to deal with flaws in the result.
Manual Stacking in Photoshop
Because the above method seldom leads to a clean result, I mostly performed focus stacking manually using masks in Photoshop in the past. I explain this method in all its detail in the next video. There, I also talk about how to combine focus stacking with exposure blending.
Automatic Stacking in Helicon Focus
Discovering Helicon Focus was a game-changer for my focus-stacking workflow. Combined with automatic focus bracketing, it works great in most situations. Even difficult scenes can be stacked much easier in Helicon Focus than in Photoshop. Woodland photos were always hard to deal with in Photoshop. In Helicon Focus, it's usually no problem as I show in the video below.
This software integrates seamlessly with Adobe Lightroom and even supports a DNG workflow, which allows you to stack your RAW images and make additional adjustments later. Within Helicon Focus, you have different stacking modes, of which I find Method B to work best for most of my images. This documentation by Helicon Focus provides further information about when to use which stacking mode.
Limitations and Alternatives
Stacking the photos in Photoshop or software like Helicon Focus is easy for many scenes. Problems arise with moving elements, especially in the foreground. Then, the photo editing involved in the focus stacking can become a pain and require retouching to fit everything together.
In such situations, experiment with different ISO settings to freeze motion as much as possible. Try to photograph the focus stacking sequence very fast. The automatic focus bracketing feature of modern cameras is a big help for that.
If there's a lot of movement, there's nearly no way to get a convincing result. The compromise is to use smaller apertures. An alternative would be to invest in a Tilt-Shift lens. The tilt of such lenses can dramatically change the area of sharpness in photos. But they are also expensive and have only a fixed focal length.
Conclusion
As I showed in this article, focus stacking is a great technique to create tack-sharp images. I shared different in-the-field focus stacking techniques and talked about limitations, photo editing, and things to look out for to capture the perfect focus stacking sequence. The video above contains a detailed summary.
Focus Stacking is only a part of the photo editing workflow though. If you want to learn more about how I edit my photos, I'm sure you'll like my Photo Editing Mega Bundle.